
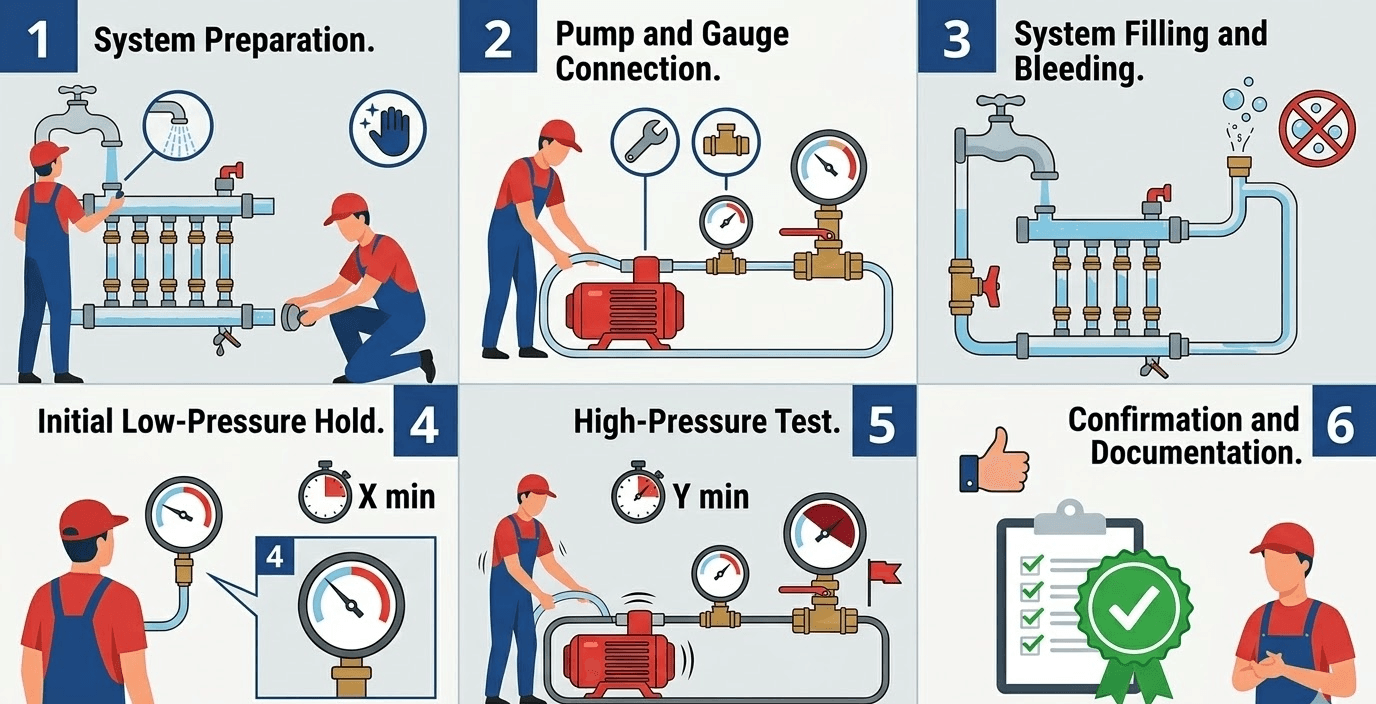
Pressure testing is a legal requirement for every SP piping system after installation is complete and before the pipes are covered with concrete, plaster, or flooring. A proper test ensures the integrity of the system and is a condition for receiving the 25-year warranty from SP Industries. Here is the complete guide to performing a pressure test according to SP 2026 instructions.
Quick Summary
- Test pressure: 1.5 × municipal network pressure, minimum 15 atmospheres
- Duration: at least 60 minutes
- Pass criterion: pressure drop of no more than 0.5 atmosphere + zero leaks
- Do not cover pipes and fittings before the test is complete
- After the test: connect to the water supply network and keep the system under pressure throughout all construction stages
Prohibited: covering before pressure testing
It is strictly forbidden to cover pipes and fittings with concrete, plaster, flooring, or any other material before a full pressure test has been carried out and passed. The only exception: sections of up to 10 cm of pipe only (without fittings) may be encased in concrete to hold the pipe in place during the test.
📋Steps for performing a pressure test on SP piping
Visual inspection first
Before applying pressure, check:
- Compliance with the installation instructions
- Strength of the joints and tightness of the connectors
- Proper execution of all bends (no crushing)
- All water outlets are fixed and visible
System operation test
Fill the system with water and make sure water reaches every point of use – including all outlets in the mixing valve and flushing tanks – at the required flow rate and pressure. Open the caps and close them after the air has been drained.
Set the test pressure
Calculate the test pressure: 1.5 × municipal network pressure, but not less than 15 atmospheres.
Example: if the network pressure is 8 atm → test pressure = 8 × 1.5 = 12 → but because of the minimum → 15 atm.
Filling and pressurizing
Fill the piping with water and purge all air from it. Then raise the pressure to the required test pressure and close the valve between the pressure pump and the system.
60-minute waiting period
Leave the system under pressure for a full hour (60 minutes minimum). Do not be tempted to shorten the test time.
Reading the results and conclusions
The test is passed if:
✅ The pressure did not drop by more than 0.5 atmosphere during the hour
✅ There are no leaks in the system
The test is failed if the pressure dropped by more than 0.5 atm, or if a leak was found.
After the test
Connect the piping to the supply network and keep it under pressure throughout all construction stages. This ensures that any damage to the pipe will be detected immediately.
Repairs after a failed pressure test
For threaded fittings – only 3 repair options:
- Leak at a connection point → tighten loose connectors
- Leak between the sleeve and the pipe → replace the sleeve (make sure the pipe reaches the end of the sleeve)
- Damaged pipe section → replace the pipe from end fitting to end fitting
For press fittings – only 2 repair options:
- Leaking fitting → replace the fitting together with the pipe section attached to it. Do not perform a re-press.
- Damaged pipe section → replace the pipe from end fitting to end fitting
⚠️ After every repair – a repeat pressure test is mandatory.
Pressure testing for the SPEX system
The SPEX system has slightly different testing requirements: pressure test at least 12 bar, allowable pressure drop up to 0.6 bar. The test is defined in standard 5433 Part 6.
Plastic caps for pressure testing (2026 catalog)
| Diameter | Item No. | Qty. per carton | Price (₪) |
|---|---|---|---|
| 16 mm | 770351 | 800 | 4.00 |
| 20 mm | 770353 | 300 | 4.80 |
| 25 mm | 770354 | 150 | 6.70 |
| 32 mm | 770355 | 100 | 12.00 |
Frequently asked questions about pressure testing
What is the minimum test pressure for SP piping?
The test pressure must be 1.5 times the municipal network pressure, but never less than 15 atmospheres in any case.
How long does the pressure test last?
A full hour (60 minutes minimum). A test that lasts less than 60 minutes is not compliant.
What is the allowable pressure drop?
A pressure drop of no more than 0.5 atmosphere over one hour – and zero leaks. Above 0.5 atm, the test has failed.
When is another pressure test required?
After every repair or modification to the piping, a repeat pressure test is mandatory. Also, if the system is tested in different stages of construction, the entire system must be tested again at the end.
Is it mandatory to flush the piping?
Yes. The piping must be flushed before occupancy – according to SP Industries instructions.
Conclusion
A proper pressure test is not just a technical requirement – it is your best protection against future leaks and disputes with suppliers. With this guide, you can carry out a complete, professional test that meets SP Industries requirements and secures the 25-year warranty.